

Here’s a secret: taking aesthetic notes on the iPad is so much easier than on paper.
When armed with a note-taking app like Goodnotes, there are so many features that enable you to create better notes, with less work.
Here are some tips & tricks on how to take aesthetic notes on the iPad.
Spoiler-alert: The tips will help you make your notes look better, even if you don’t have perfect handwriting.
1. Play around with pen settings to find the style you like
In Goodnotes, there are 3 main pens to choose from and they all write differently.
The fountain pen and brush pen are pressure sensitive. That means that the ink will change based on much you press down and how quickly you write. For the fountain pen, you can also adjust how pointy you’d prefer the tip to be. These pens are great for calligraphy or giving a bit more character to your notes.
The ball pen, on the other hand, will always give you a uniform line. No matter how much pressure you’re using, the ink will look the same and therefore give you better control.

The thickness of your pen strokes can also change the look and feel of your handwriting.
Test the variety of pens to find the one with the aesthetic you like the most.
Tip: Try mixing it up! Use the brush pen for your headings or titles to make them stand out. Use the fountain or ball pen to take the bulk of your notes.
2. Edit your notes after writing them
This is where taking aesthetic notes on the iPad really shines: the ability to resize or move ink on the page after jotting it down.
Examples of how you can edit your digital notes:
- Running out of space? Move your notes up the page, or move a sentence to exactly the right spot.
- Move bullet points around so that they are perfectly aligned
- Change the color of the ink or the size of your writing

Tip from studygrammer @cupofstudies:
Since her handwriting gets messier the larger she writes, she tends to write headers smaller and increase the size afterward.
At the same time, consider staring big and then going small for objects that require more precision, like graphs and sketches. Draw them as big as you need to and then size them down so that they fit in where you want them to be.
3. Zoom in and out to find the best size and position to write
Both writing too small and writing too large can throw you off your game.
Sometimes writing too large can give you less control of your pen, and too small can cram your otherwise nice handwriting into scribbles.
The good thing about taking notes on the iPad is that you can zoom in and out to write at whatever size you feel the most comfortable with.
That means that you can zoom into a piece of lined paper until you can write in-between the lines, and perfect each stroke.
In Goodnotes, there’s a self-advancing Zoom window — part of your page will be zoomed in for you to write, while keeping the full page in view.

4. Use squared paper to write in straight lines
Achieve perfectly straight lines every time with this hack:
Write on squared paper and let the grid lines help you align your writing. Then, once you’re done writing, switch the paper template back to blank.
And voila! You’ve achieved perfectly straight handwriting and now have a page of neat and aesthetic notes.
5. Try writing on a matte screen protector
If you’re not used to writing on the slick screen of the iPad, consider getting a matte screen protector.
This will add the friction you’re used to when writing on paper, and could help you get more comfortable writing on the iPad.
Check out Paperlike, or do a quick search on Amazon.
Tip: A matte screen protector can slightly reduce the crispness of the display.
6. Add a splash of color with highlighters
They’re not just for highlighting!
Highlighter ink appears as a softer color than the pen ink, and can add a splash of color without distracting from your notes.
In Goodnotes, it always falls behind your pen ink so as not to cover up your text.

So in addition to highlighting important information, you can also try:
- Drawing boxes to frame your notes or to create new sections
- Underlining your headings
- Creating shadows
- Coloring in any shapes or diagrams
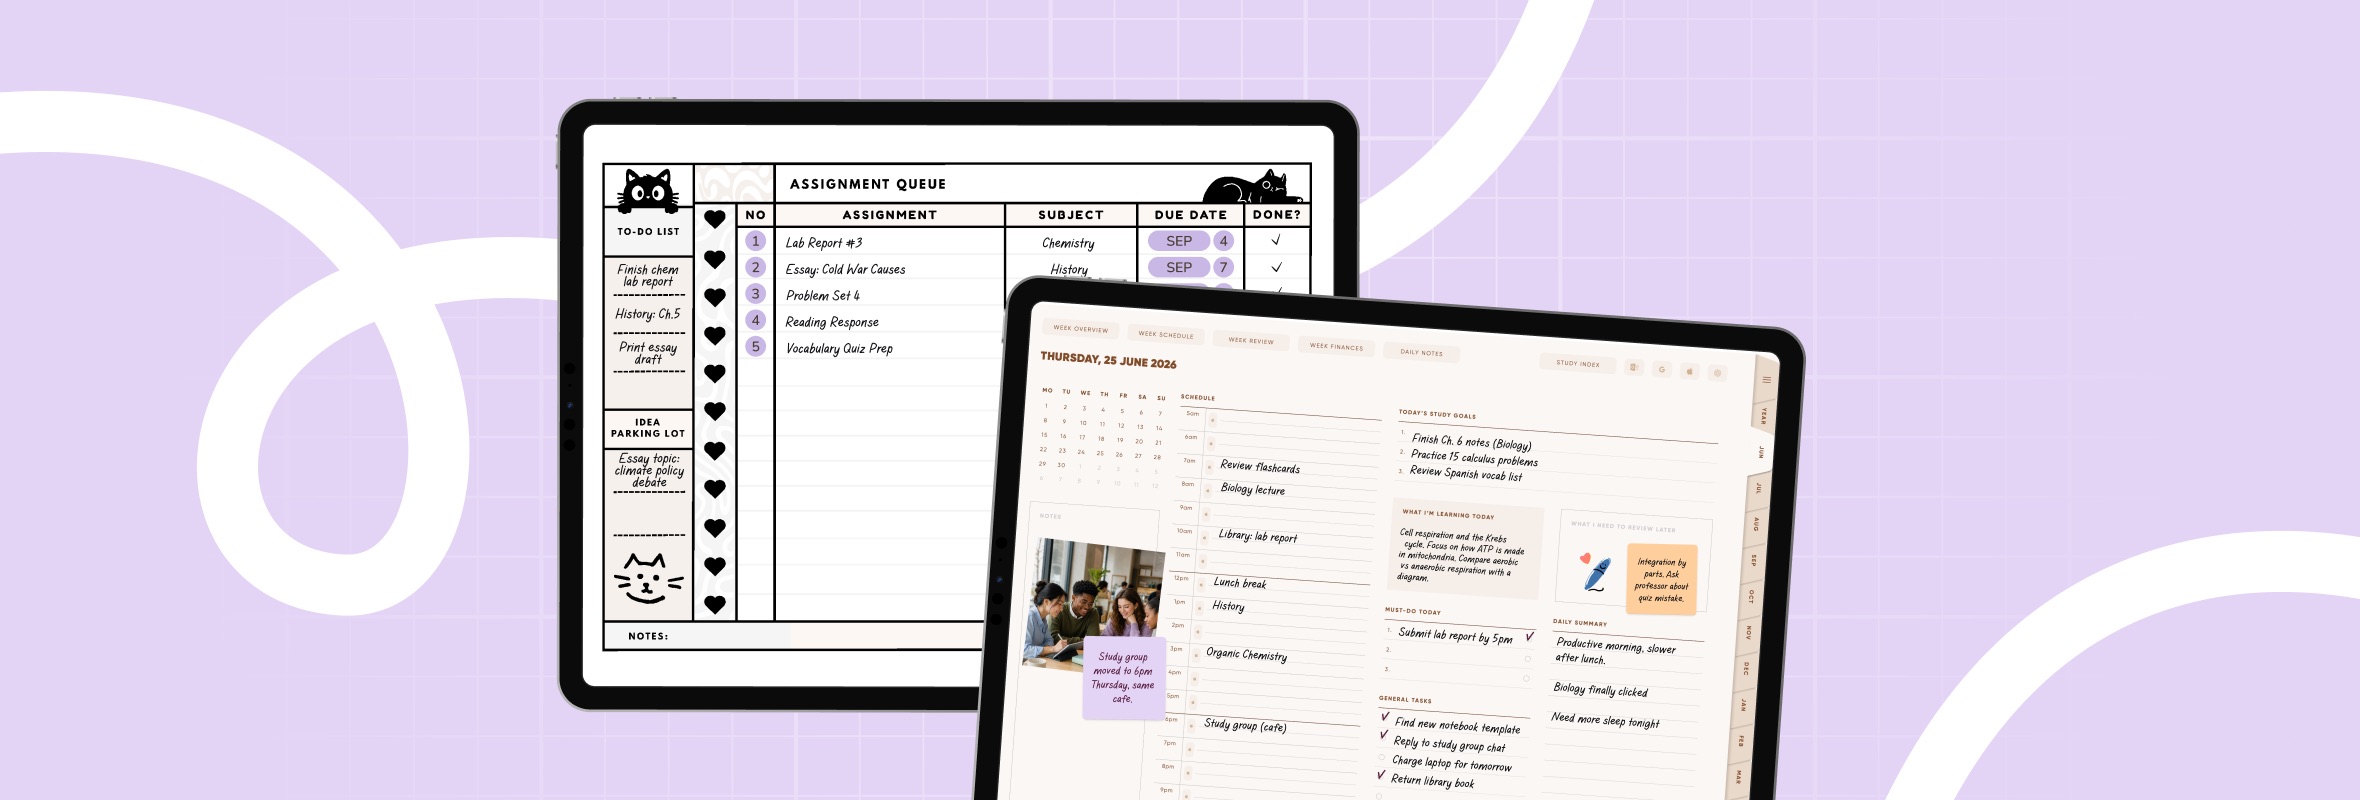
7. Explore digital planners and templates
While Goodnotes comes with a variety of default templates, you can also import your own.
It’s similar to finding beautiful stationery: instead of changing your handwriting, let the paper transform the way your notes look.
You can find well-designed bullet journal spreads, daily or monthly planners, and even templates for different study notes.

We rounded up some of our favorite digital planners here.
8. Add stickers and images
Stickers are another no-brainer tip — you can take your normal notes, add a few stickers and make them bright or beautiful to look at.
Goodnotes comes with several default sticker packs from sticky notes, mind map shapes, to decorative stickers too.

With iOS 16’s new image cropping tool, you can turn your images into stickers too, as your backgrounds will automatically crop out!
Check out our blog post for some free (and premium) digital stickers.
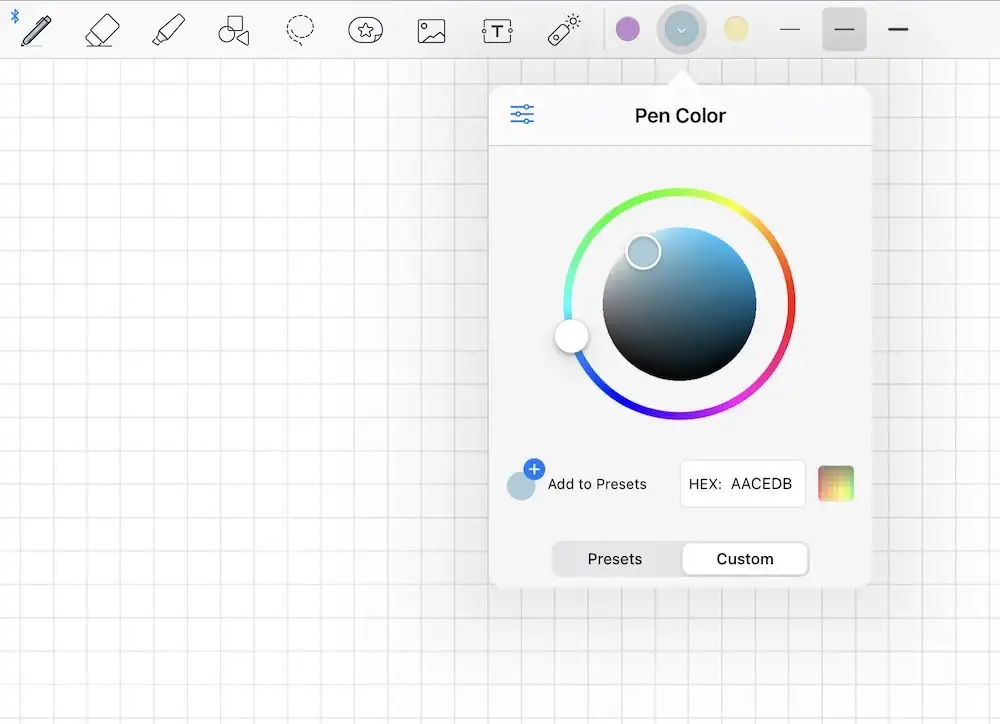
9. Follow a color scheme
Which colors look best together?
When you take notes on the iPad, you literally have access to every color, meaning you can build your own color themes and palettes to use in your notes.
Find your colors you want to use, and save them as presets for easy access.
Take aesthetic iPad notes with Goodnotes
Join millions of people worldwide taking beautiful, searchable notes in Goodnotes. Or, for more information, read our list of best practices on taking notes on the iPad.

.png)

